Configuring RBAC for Azure Event Hubs
Azure Event Hubs lets you handle large-scale, real-time data streams - but securing access is critical. Role-Based Access Control (RBAC) ensures secure, identity-based permissions, eliminating the risks of shared access keys (SAS). With RBAC, you control who can send, receive, or manage data, while improving traceability and simplifying credential management.
Key Points:
- RBAC Roles: Use built-in roles like Data Owner, Data Sender, and Data Receiver for specific permissions.
- Why RBAC over SAS:
- Identity-based authentication (no shared secrets).
- Immediate access revocation by removing roles.
- Better security with features like two-factor authentication.
- Best Practices: Assign roles at the smallest scope (e.g., Event Hub level), use managed identities, and regularly audit role assignments.
RBAC not only secures your Event Hubs but also reduces the complexity of managing access credentials. Below, find step-by-step guidance for setting up RBAC in Azure.
Authentication and authorization options for Azure Event Hubs
sbb-itb-79ce429
Azure Event Hubs RBAC Roles and Permissions

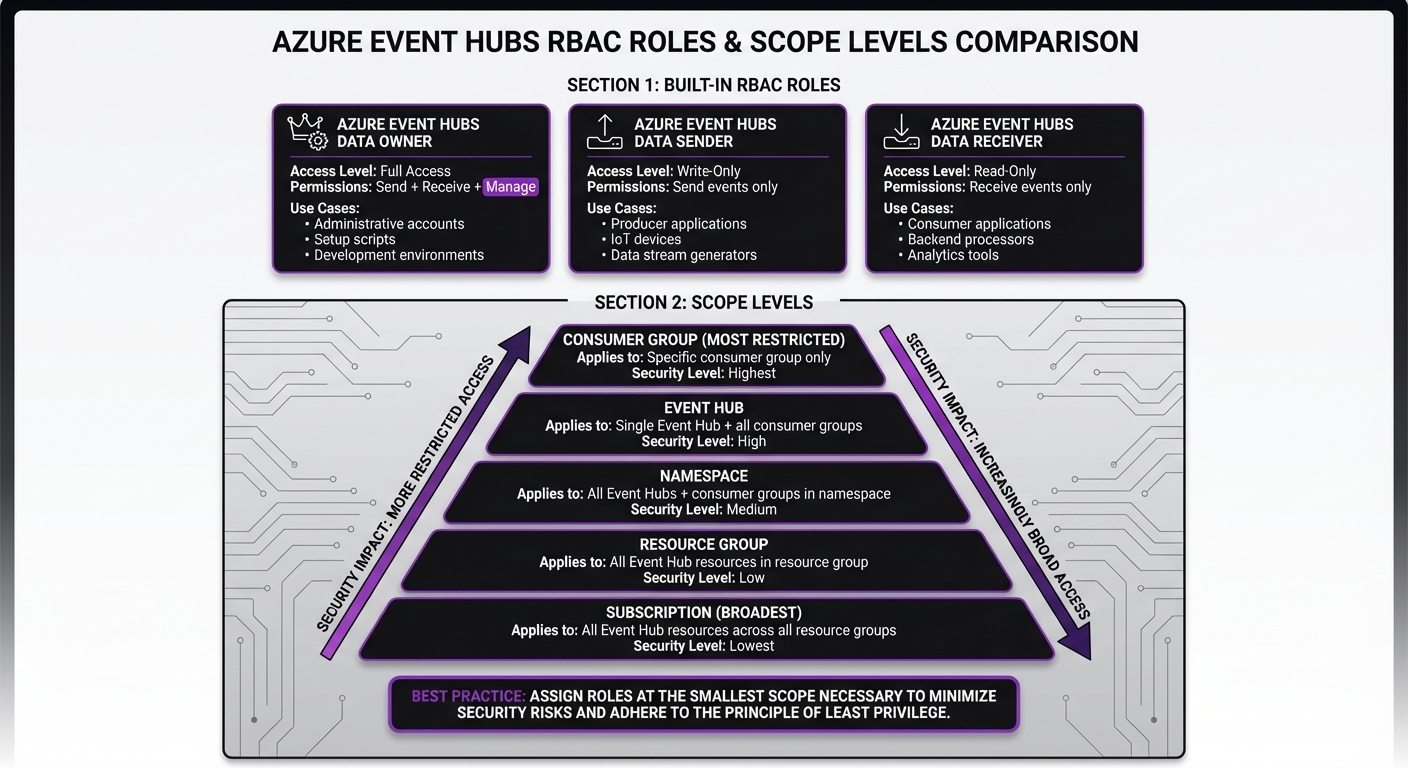
Azure Event Hubs RBAC Roles and Scope Levels Comparison
Built-In RBAC Roles for Event Hubs
Azure offers three primary roles to manage data operations in Event Hubs:
- Azure Event Hubs Data Owner: This role provides complete access to Event Hubs resources, including sending and receiving events and managing the data plane. It's ideal for administrative accounts, setup scripts, or development environments where full access is needed to test both producer and consumer functionality.
- Azure Event Hubs Data Sender: Designed for producer applications, IoT devices, or systems generating data streams, this role allows identities to send events to an event hub. It provides write-only access without any additional permissions.
- Azure Event Hubs Data Receiver: This role is for consumer applications, backend processors, or analytics tools that need to read events from an event hub. It grants read-only access, ensuring a clear separation between producers and consumers.
Important: Only Event Hubs–specific "Data" roles enable streaming operations.
How to Assign Roles Correctly
To use these roles securely, assign them with the narrowest possible scope. Azure supports role assignments at different levels: Subscription, Resource Group, Namespace, Event Hub, or Consumer Group. The narrower the scope, the stronger your security.
For example, if an application sends data to a single event hub, assign the Azure Event Hubs Data Sender role at the Event Hub level rather than at the Namespace or Resource Group level. This minimizes risk if credentials are exposed or misconfigured.
Where possible, assign roles to managed identities (e.g., on Virtual Machines or Azure Functions). Managed identities eliminate the need to store credentials, as authentication happens automatically, and access is controlled by the assigned role.
For consumer groups, you can scope access down to a single group, although portal support for this granularity is currently limited. In most production environments, scoping access at the Event Hub level strikes a good balance between granularity and manageability.
Note: Revoked role assignments may remain active until the associated OAuth token expires (up to 24 hours). Restarting the application can enforce immediate revocation.
How to Configure RBAC for Azure Event Hubs
Before diving in, ensure you have either the User Access Administrator or Owner role on your Azure subscription. These roles include the Microsoft.Authorization/roleAssignments/write action, which is required for assigning RBAC roles. You’ll also need a Microsoft Entra ID security principal, which could be a user, group, service principal, or managed identity.
Here’s how you can configure RBAC using both the Azure CLI and the Azure Portal.
Configuring RBAC with Azure CLI
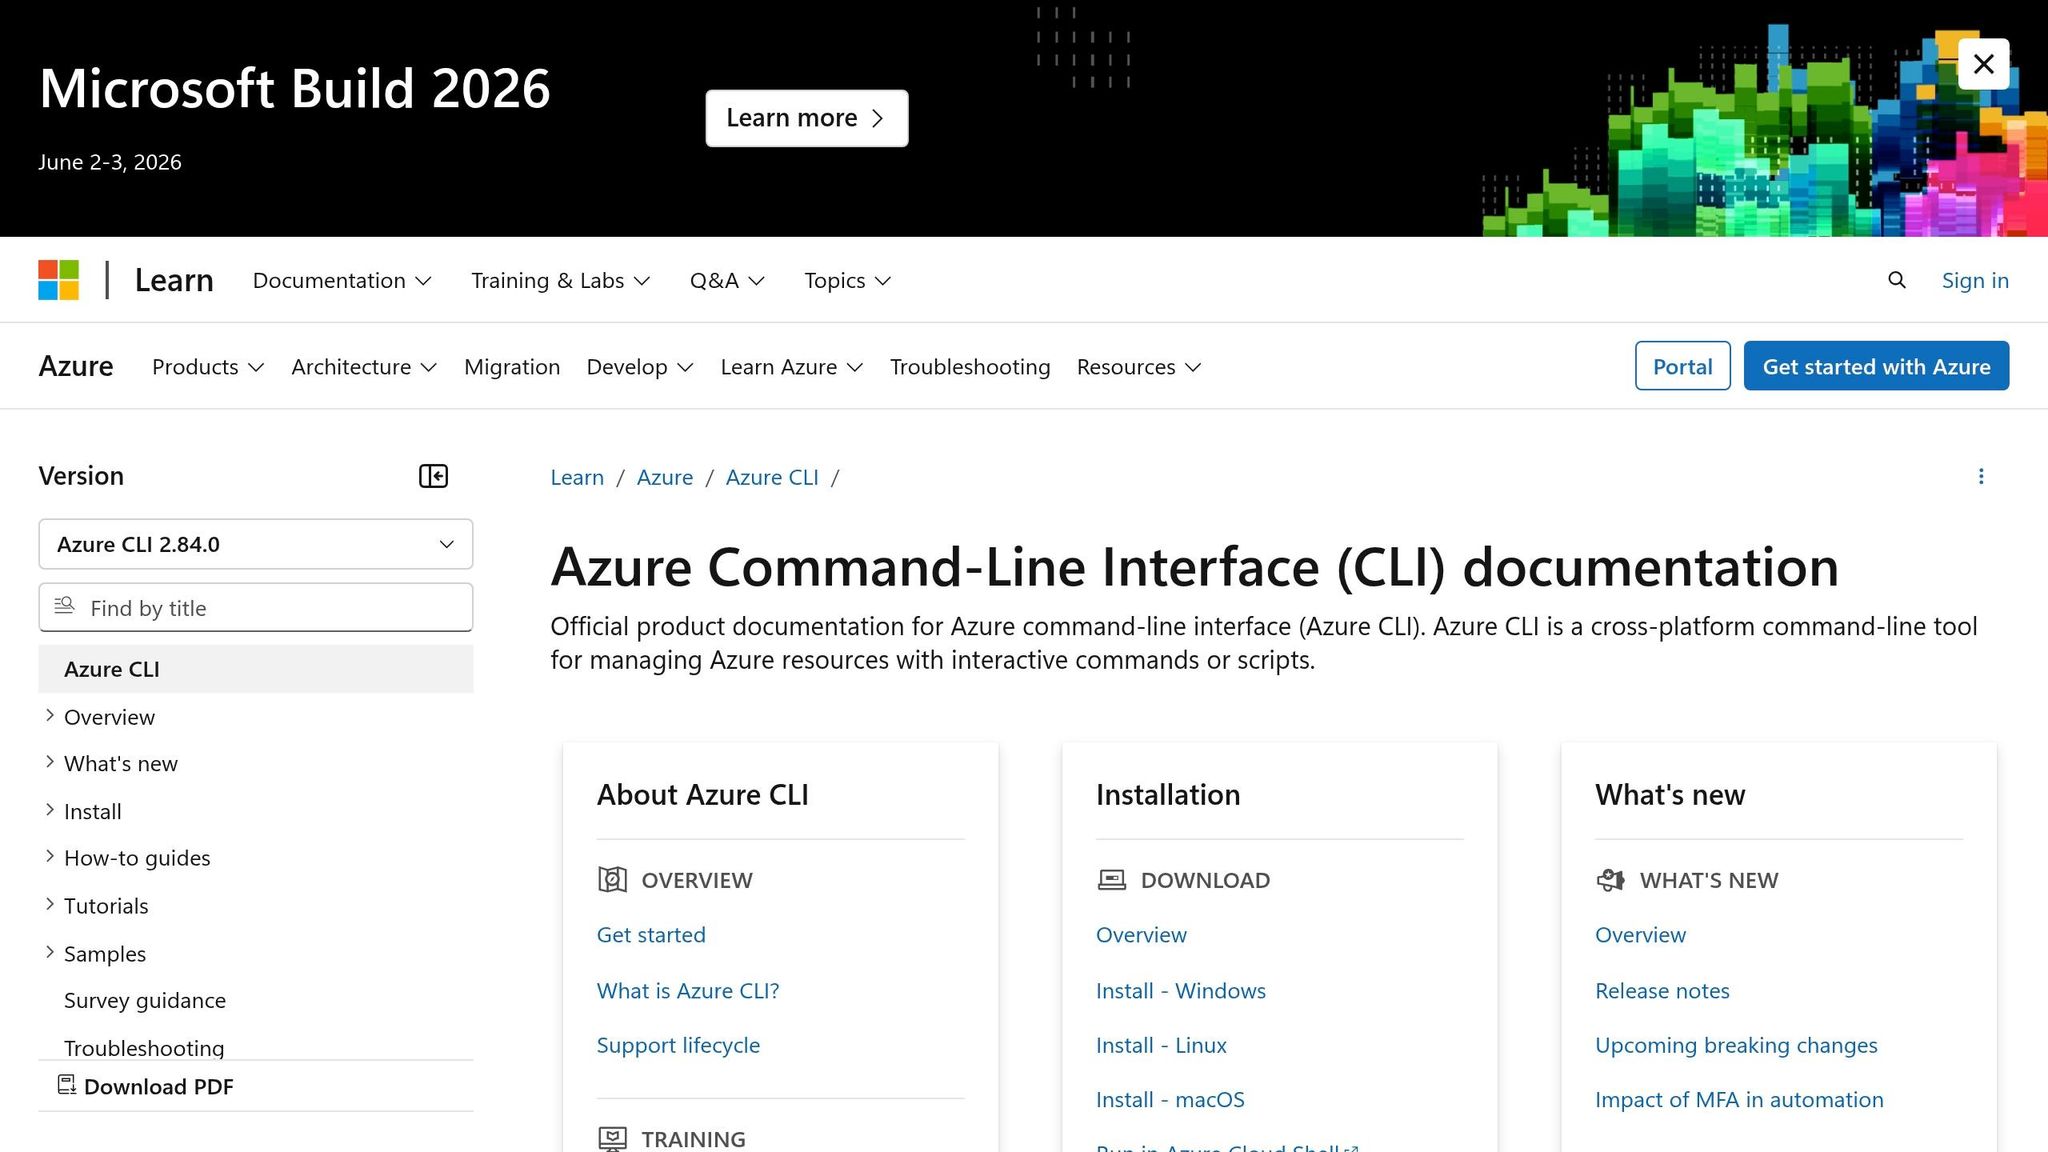
The Azure CLI is a fast and scriptable option for assigning roles. Start by retrieving the resource ID for your Event Hubs namespace:
az eventhubs namespace show -g '<resource-group>' -n '<namespace-name>' --query id
Save this resource ID, as you’ll need it for the scope. Then, assign the role with the following command:
az role assignment create --assignee "<user@domain>" --role "Azure Event Hubs Data Owner" --scope "<resource-id>"
- Replace
<user@domain>with the email of the user or the object ID of a managed identity. - For the
--roleparameter, use the exact role name: "Azure Event Hubs Data Owner", "Azure Event Hubs Data Sender", or "Azure Event Hubs Data Receiver." - For the
--scopeparameter, enter the resource ID you retrieved earlier.
Role assignments usually take 1–2 minutes to propagate. However, in rare cases, it may take up to 8 minutes. If your application encounters authentication errors right after assignment, wait a few minutes before troubleshooting further.
Configuring RBAC with the Azure Portal
The Azure Portal offers a user-friendly interface for setting up role assignments. Follow these steps:
- Navigate to your Event Hubs namespace or a specific event hub in the portal.
- Select Access control (IAM) from the left-hand menu.
- Click + Add > Add role assignment.
From here:
- On the Role tab, search for and select the desired role, such as "Azure Event Hubs Data Sender."
- Click Next to move to the Members tab.
- Choose the type of security principal (User, Group, Service Principal, or Managed Identity).
- Click + Select members and pick the identity you want to assign the role to.
- Finish by selecting Review + assign.
It may take up to 5 minutes for role assignments to propagate. If you remove a managed identity from a role, restart the associated application or service immediately to expire its OAuth token. Otherwise, the token may remain valid for up to 24 hours, allowing continued access during that time.
Testing and Verifying RBAC Configuration
After assigning roles, it's important to confirm that everything is working as expected. This involves reviewing role assignments and actively testing permissions through an application.
Verifying Role Assignments
The simplest way to check role assignments is through the Azure Portal. Here's how:
- Go to your Event Hubs namespace.
- Select Access control (IAM).
- Click on Role assignments to view all users and their roles.
If you want to check permissions for a specific identity, use the Check access feature to see all assigned roles.
Prefer command-line tools? The Azure CLI makes verification straightforward:
az role assignment list --assignee <identity> --scope <resource-id>
Replace <identity> with the user's email or object ID, and <resource-id> with the Event Hubs namespace's resource ID. For PowerShell users, you can use this command:
Get-AzRoleAssignment -SignInName <user@domain> -Scope <resource-id>
Once you've confirmed the role assignments, it's time to test whether the assigned permissions work as intended.
Testing Access Permissions
It's not enough to just review role assignments - you need to test them in action. A practical way to do this is by running a producer or consumer application. Use DefaultAzureCredential for authentication, as it automatically identifies the identity based on your current environment, whether you're logged in through the CLI or using a managed identity.
To ensure the roles are functioning correctly, perform a series of tests. For example, a cross-language test involving a Java producer and a Go consumer confirmed that service principals with distinct sender and receiver roles could only perform their specific tasks. When credentials were swapped, authorization failures occurred, demonstrating proper role enforcement [2].
Here’s how to test:
- Create separate service principals for sender and receiver roles.
- Set the following environment variables for
DefaultAzureCredential:AZURE_CLIENT_IDAZURE_CLIENT_SECRETAZURE_TENANT_ID
- Validate that a principal with the "Data Receiver" role cannot send messages, and a principal with the "Data Sender" role cannot receive messages. This negative testing ensures the Principle of Least Privilege is in place.
If you encounter authorization errors right after assigning roles, give it a minute or two for the changes to propagate. Check Azure Monitor logs for 401 (Unauthorized) or 403 (Forbidden) errors to troubleshoot any permission issues during testing.
Security Best Practices for RBAC in Azure Event Hubs
After setting up RBAC, the next step is ensuring your configuration is secure enough for production. This means tightening access controls and minimizing potential vulnerabilities.
Implementing the Principle of Least Privilege
Always assign the smallest scope necessary for access. For example, instead of granting roles at the namespace level, assign them to a specific Event Hub or even a consumer group. If a developer only needs to read from one Event Hub, assign the "Data Receiver" role to that specific Event Hub. This approach minimizes potential damage if credentials are ever compromised.
Avoid using the RootManageSharedAccessKey for regular application access. Think of it as a "break glass in case of emergency" tool for administrative tasks, not something for daily use. Assigning roles broadly - like at the subscription or resource group level - gives excessive permissions, which contradicts the principle of least privilege.
| Scope Level | Scope Effect |
|---|---|
| Consumer Group | Most restricted; applies only to a specific consumer group. |
| Event Hub | Covers a single Event Hub and all its consumer groups. |
| Namespace | Includes all Event Hubs and consumer groups within the namespace. |
| Resource Group | Extends to all Event Hub resources in the specified resource group. |
| Subscription | Broadest scope; applies to all Event Hub resources across all resource groups. |
Combining strict scope management with modern identity solutions can further enhance security.
Using Managed Identities
Managed identities remove the need to store credentials in code or configuration files. Azure automatically rotates these credentials, so you don’t have to worry about expired secrets or manual updates. If you remove a managed identity, restart the application to ensure cached tokens are invalidated.
For production environments, managed identities should be your first choice over Shared Access Signatures (SAS). SAS keys require manual rotation and full key regeneration, which can disrupt all applications using them. Managed identities, on the other hand, allow fine-grained access control and immediate revocation by simply adjusting role assignments. To enforce this, disable local SAS key authentication at the namespace level so access is exclusively managed through RBAC.
Strong identity management should go hand-in-hand with continuous monitoring of access and configurations.
Auditing and Monitoring Role Assignments
Regularly review role assignments to prevent unauthorized access or "permission creep." Tools like Microsoft Defender for Cloud can help you monitor your security baseline and recommend improvements for Event Hubs. You can also use Azure Policy to enforce secure configurations, such as denying the creation of namespaces with local authentication enabled.
Enable Azure Resource Logs to collect service-specific metrics and send them to a Log Analytics workspace. Focus your auditing efforts on the smallest possible scope, such as individual Event Hubs, to quickly identify accounts with excessive privileges. Set up Azure Monitor alerts to notify you about configuration changes or suspicious access patterns.
Activity logs are particularly useful for tracking control plane actions, like assigning or removing roles, while resource logs capture data plane activities, such as identities sending or receiving messages. Keep in mind that role assignment propagation usually takes one to two minutes but, in rare cases, can take up to eight minutes [1].
Conclusion
Azure Event Hubs becomes a tightly managed and secure messaging service with Role-Based Access Control (RBAC). By replacing shared access keys with role-based permissions, you minimize the risk of credential leaks and gain fine-grained control over who can send, receive, or manage your event streams.
The three built-in roles - Data Owner, Data Sender, and Data Receiver - work seamlessly with managed identities, removing the hassle of manual credential management. With Azure handling automatic credential rotation, you can focus on operations without worrying about security gaps.
But setting up RBAC is just the beginning. Ongoing security measures like auditing role assignments, using Azure Monitor for tracking, and applying governance policies through Azure Policy ensure your Event Hubs remain secure as your organization evolves.
Transitioning from SAS keys to RBAC not only enhances security but also supports scalable and compliant event-driven architectures. Whether you're working with IoT telemetry, financial data, or healthcare information, RBAC helps maintain both control and flexibility. This approach complements the detailed configurations and testing steps discussed earlier.
FAQs
Which RBAC role should my app use - Data Owner, Data Sender, or Data Receiver?
Your app needs to use either the Azure Event Hubs Data Receiver role for receiving data or the Azure Event Hubs Data Sender role for sending data. Select the role that aligns with your app’s purpose and the permissions it requires.
What scope should I assign the role at (namespace, event hub, or consumer group)?
Assigning roles in Azure Event Hubs is all about determining the right level of access. If you need broad permissions across all event hubs and consumer groups within a namespace, assign roles at the namespace scope. For more precise access, you can assign roles at the event hub level. However, assigning roles at the consumer group level is uncommon and usually reserved for scenarios requiring extremely detailed access control.
Why does access still work after I remove a role assignment?
When you remove a role assignment, access may still function briefly. This happens because role assignments can be cached, and it may take up to 5 minutes for updates to fully take effect. During this window, permissions might linger temporarily until the system enforces the changes.