Best Practices for Large Data Transfers to Azure
Transferring large datasets to Azure - whether terabytes or petabytes - requires careful planning to avoid delays, disruptions, or data loss. Here’s what you need to know:
-
Assess Bandwidth and Data Size:
- Measure your network speed realistically (e.g., 100 Mbps can take months for large datasets).
- Consider offline solutions like Azure Data Box for slow connections or massive data.
-
Choose the Right Transfer Tools:
- Offline: Azure Data Box (Disk, Next-Gen) for faster physical transfers.
- Online: AzCopy for high-speed networks; Azure Data Factory for complex pipelines.
-
Optimize Efficiency:
- Use parallel transfers and compression to save time.
- Group small files into larger archives to reduce overhead.
-
Ensure Security:
- Encrypt all data during transfer (AES 256-bit for offline, HTTPS for online).
- Use Azure Key Vault for managing encryption keys.
-
Verify Data Integrity:
- Use logs and tools to ensure all files and metadata arrive intact.
-
Plan and Monitor:
- Test the process with a small dataset before full migration.
- Schedule transfers during low-traffic hours to minimize impact.
Azure Data Transfer Methods Comparison: Bandwidth, Timeline, and Tool Selection Guide
Demystifying large migrations into Azure Storage | Azure Friday
Assess Network Bandwidth and Data Size
Getting a handle on your network bandwidth and dataset size is crucial when planning an Azure migration. These factors help you determine the most efficient transfer method for your data.
Calculate Available Network Bandwidth
Start by measuring your actual upload speed (in Mbps). Tools like Speedtest.net can help, but keep in mind that real-world performance often falls short of what your ISP advertises due to congestion or other interference.
Another way to calculate your upload speed is to time the transfer of a file with a known size. Divide the file size by the transfer time to get your speed. Remember, ISPs use megabits per second (Mbps), while file sizes are typically measured in megabytes (MB). To convert, note that one megabyte equals eight megabits.
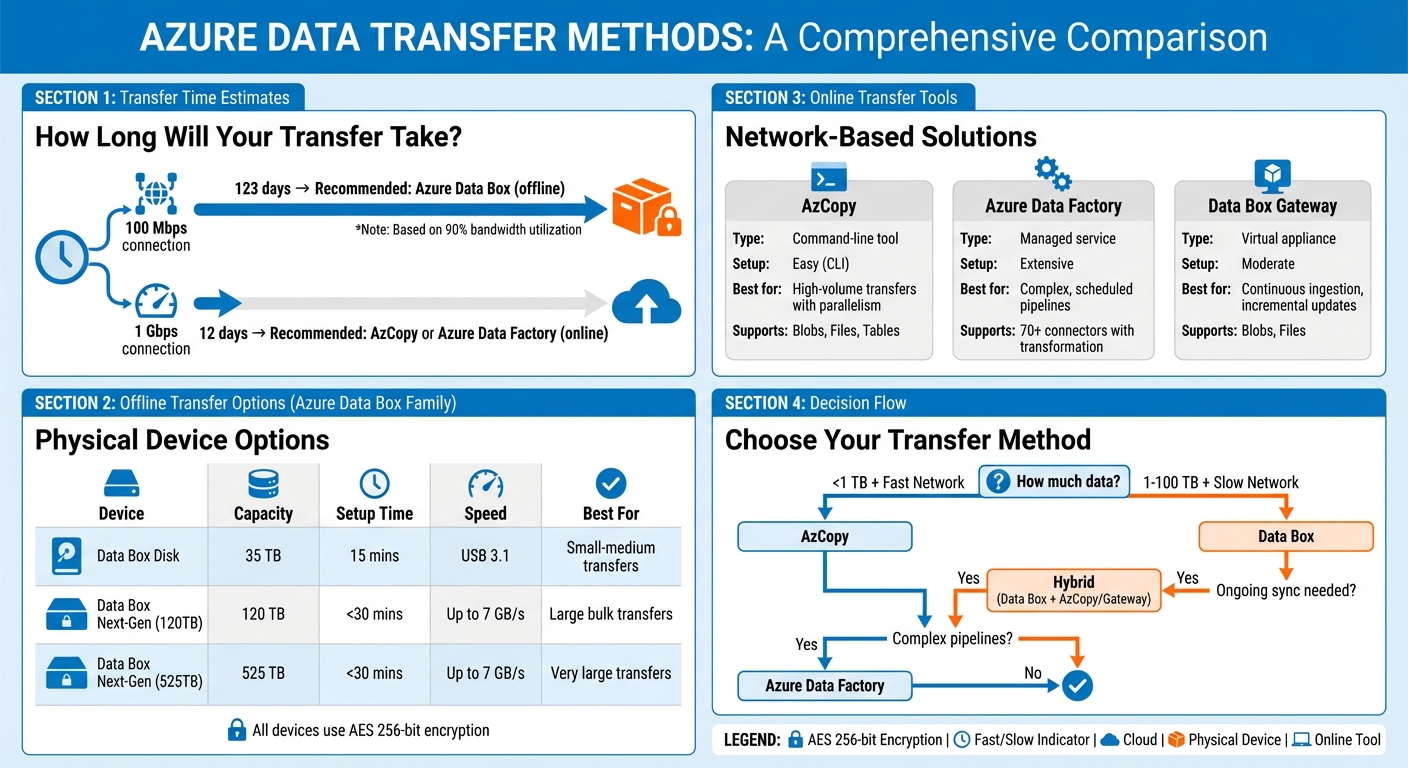
When estimating transfer times, assume that only 90% of your bandwidth will be usable due to network overhead. For example, if you have a 1 Gbps connection, you could transfer 100 TB in about 12 days at 90% utilization. On a 100 Mbps connection, however, that same data would take roughly 123 days. If your calculations show that the transfer will take weeks or months, offline solutions like the Azure Data Box family might be a better choice.
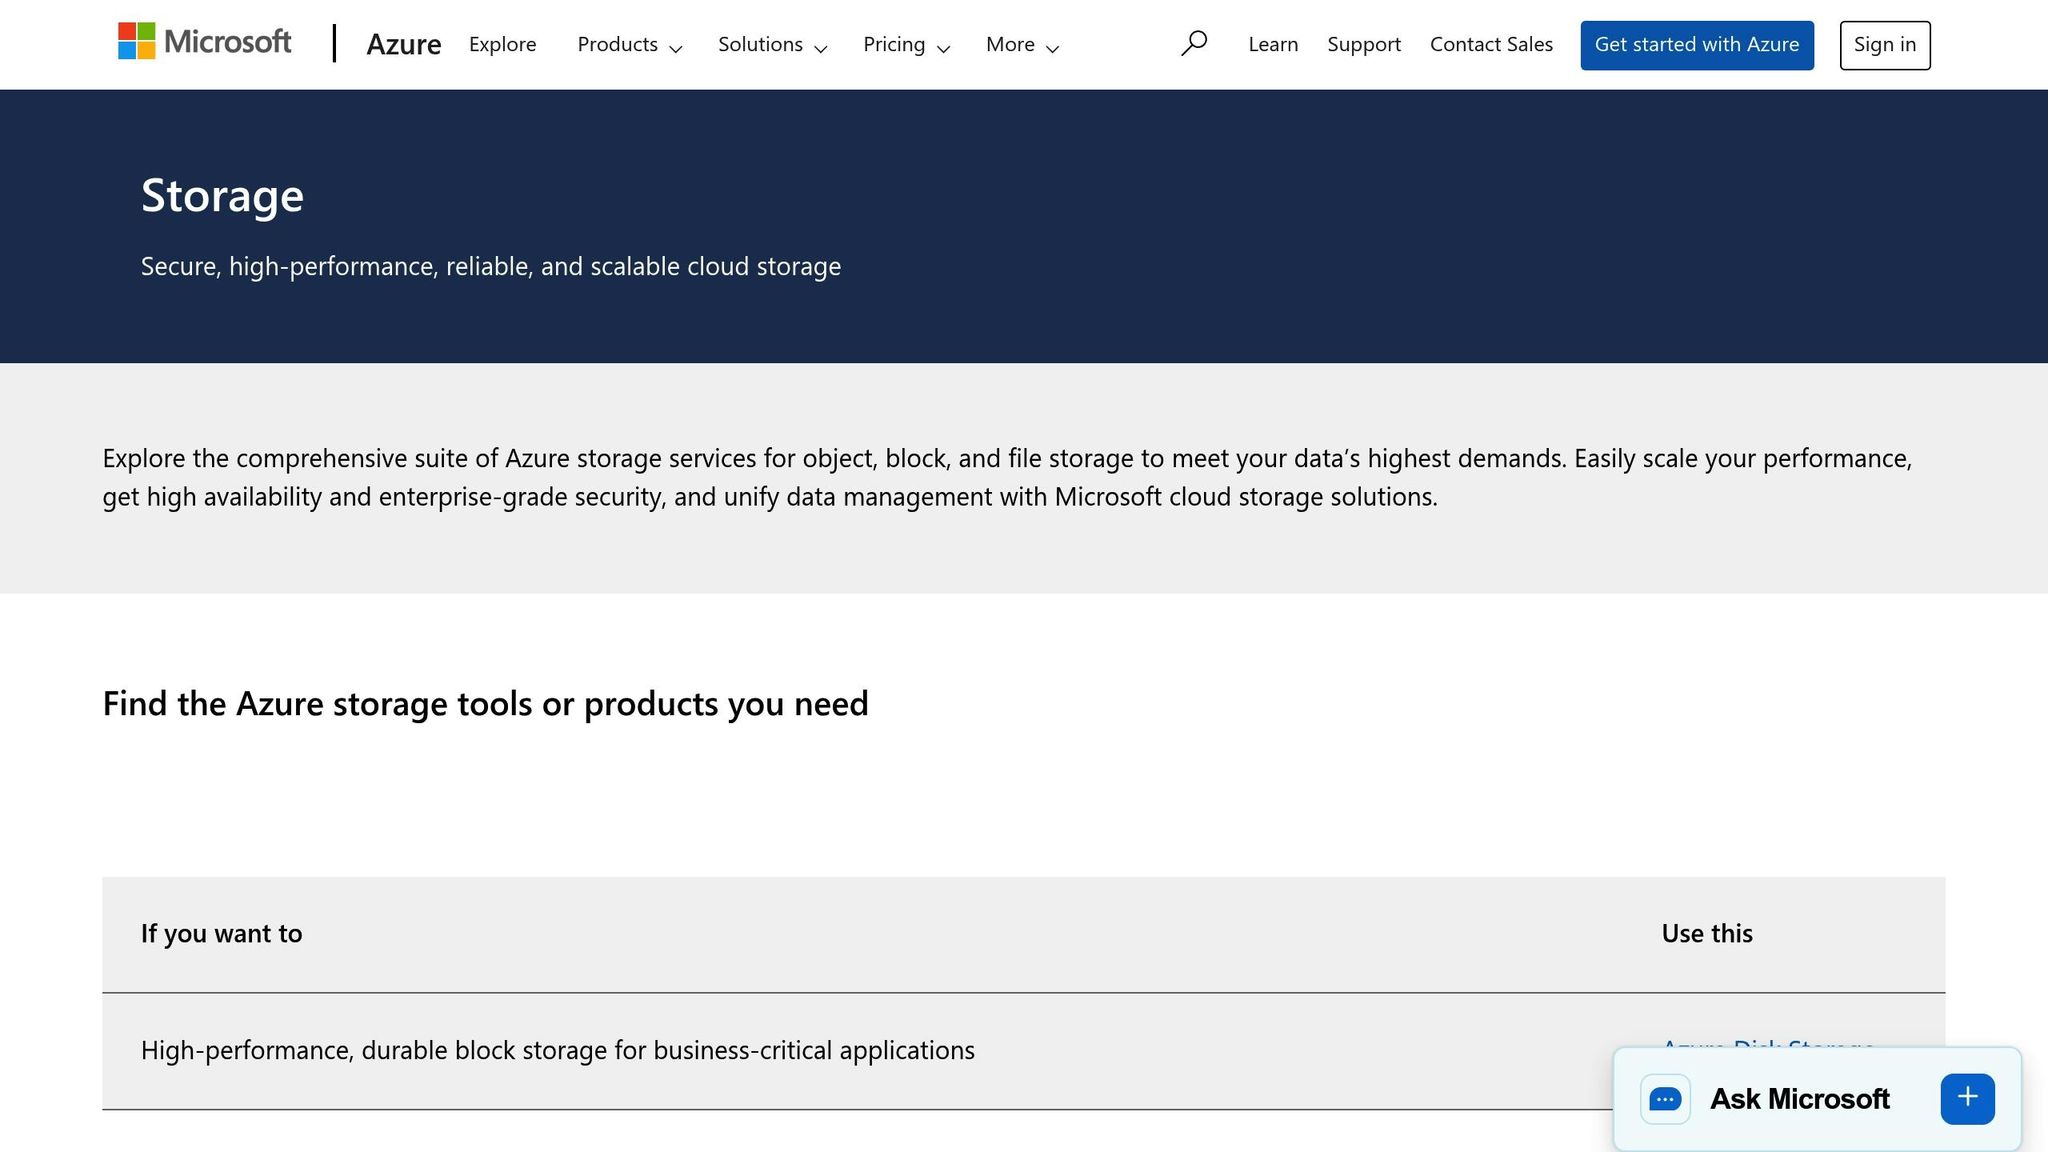
Azure’s Data transfer feature, available in the Storage account menu, can simplify these calculations by suggesting tools and methods based on your bandwidth and data size.
Next, take a closer look at your dataset’s size and structure to fine-tune your migration approach.
Estimate Dataset Size and Characteristics
While total data size is important, the structure of your dataset can significantly impact transfer speeds. For instance, millions of small files (64 KB to 512 KB) will take much longer to transfer than the same volume of larger files (8 MB to 128 MB) because of the higher overhead associated with small files. Using newer Data Box hardware can speed up transfers for large files by as much as seven times compared to smaller ones.
When planning, evaluate your dataset's structure and the type of Azure storage you’ll use - Blobs, Files, or Tables. This ensures a secure and efficient migration. Also, consider whether you need to preserve file metadata and NTFS permissions. For example, while the standard Data Box maintains file metadata, the Data Box Disk does not.
Your migration type - whether it’s a one-time bulk transfer, periodic updates, or continuous ingestion - will also influence your choice between online and offline methods. Additionally, if your data is highly sensitive and your organization doesn’t allow outbound network connections, an offline transfer will likely be your only option.
Here’s a quick guide to network speed categories and recommended approaches based on transfer times:
| Bandwidth Category | Speed Range | Estimated Time for 100 TB (at 90% utilization) | Recommended Approach |
|---|---|---|---|
| Moderate | 100 Mbps – 1 Gbps | 123 days (at 100 Mbps) | For longer transfers, offline options like Azure Data Box are ideal; AzCopy may work if speed is acceptable |
| High | 1 Gbps – 100 Gbps | 12 days (at 1 Gbps) | Use tools like AzCopy, Azure Data Factory, or Storage REST APIs to speed things up |
Choose the Right Transfer Method
After evaluating your bandwidth and dataset, it's time to decide on the best transfer method. The choice boils down to whether your timeline allows for network-based transfers or if physical devices are necessary. When network transfers are too slow, offline methods often prove quicker and more practical.
For one-time, large-scale migrations - especially when dealing with terabytes or even petabytes of data - the Azure Data Box family is a solid option. On the other hand, if you have a fast network connection (100 Mbps or higher), need ongoing data ingestion, or are handling periodic updates, online tools like AzCopy, Azure Data Factory, and Data Box Gateway are better suited.
A hybrid approach works well too. Start with a seed-and-feed strategy: use a Data Box for the initial bulk transfer (the "seed"), then switch to online tools for incremental updates (the "feed"). This approach combines the speed of offline transfers with the flexibility of network-based solutions for ongoing data needs.
Security requirements also influence your choice. If your organization restricts outbound network connections for sensitive data, offline transfers using AES 256-bit encrypted devices may be your only option. Conversely, if near-zero downtime or real-time synchronization is critical, online methods are typically the way to go. Aligning your transfer method with your security policies ensures compliance and efficiency.
Offline Transfers: Azure Data Box Family
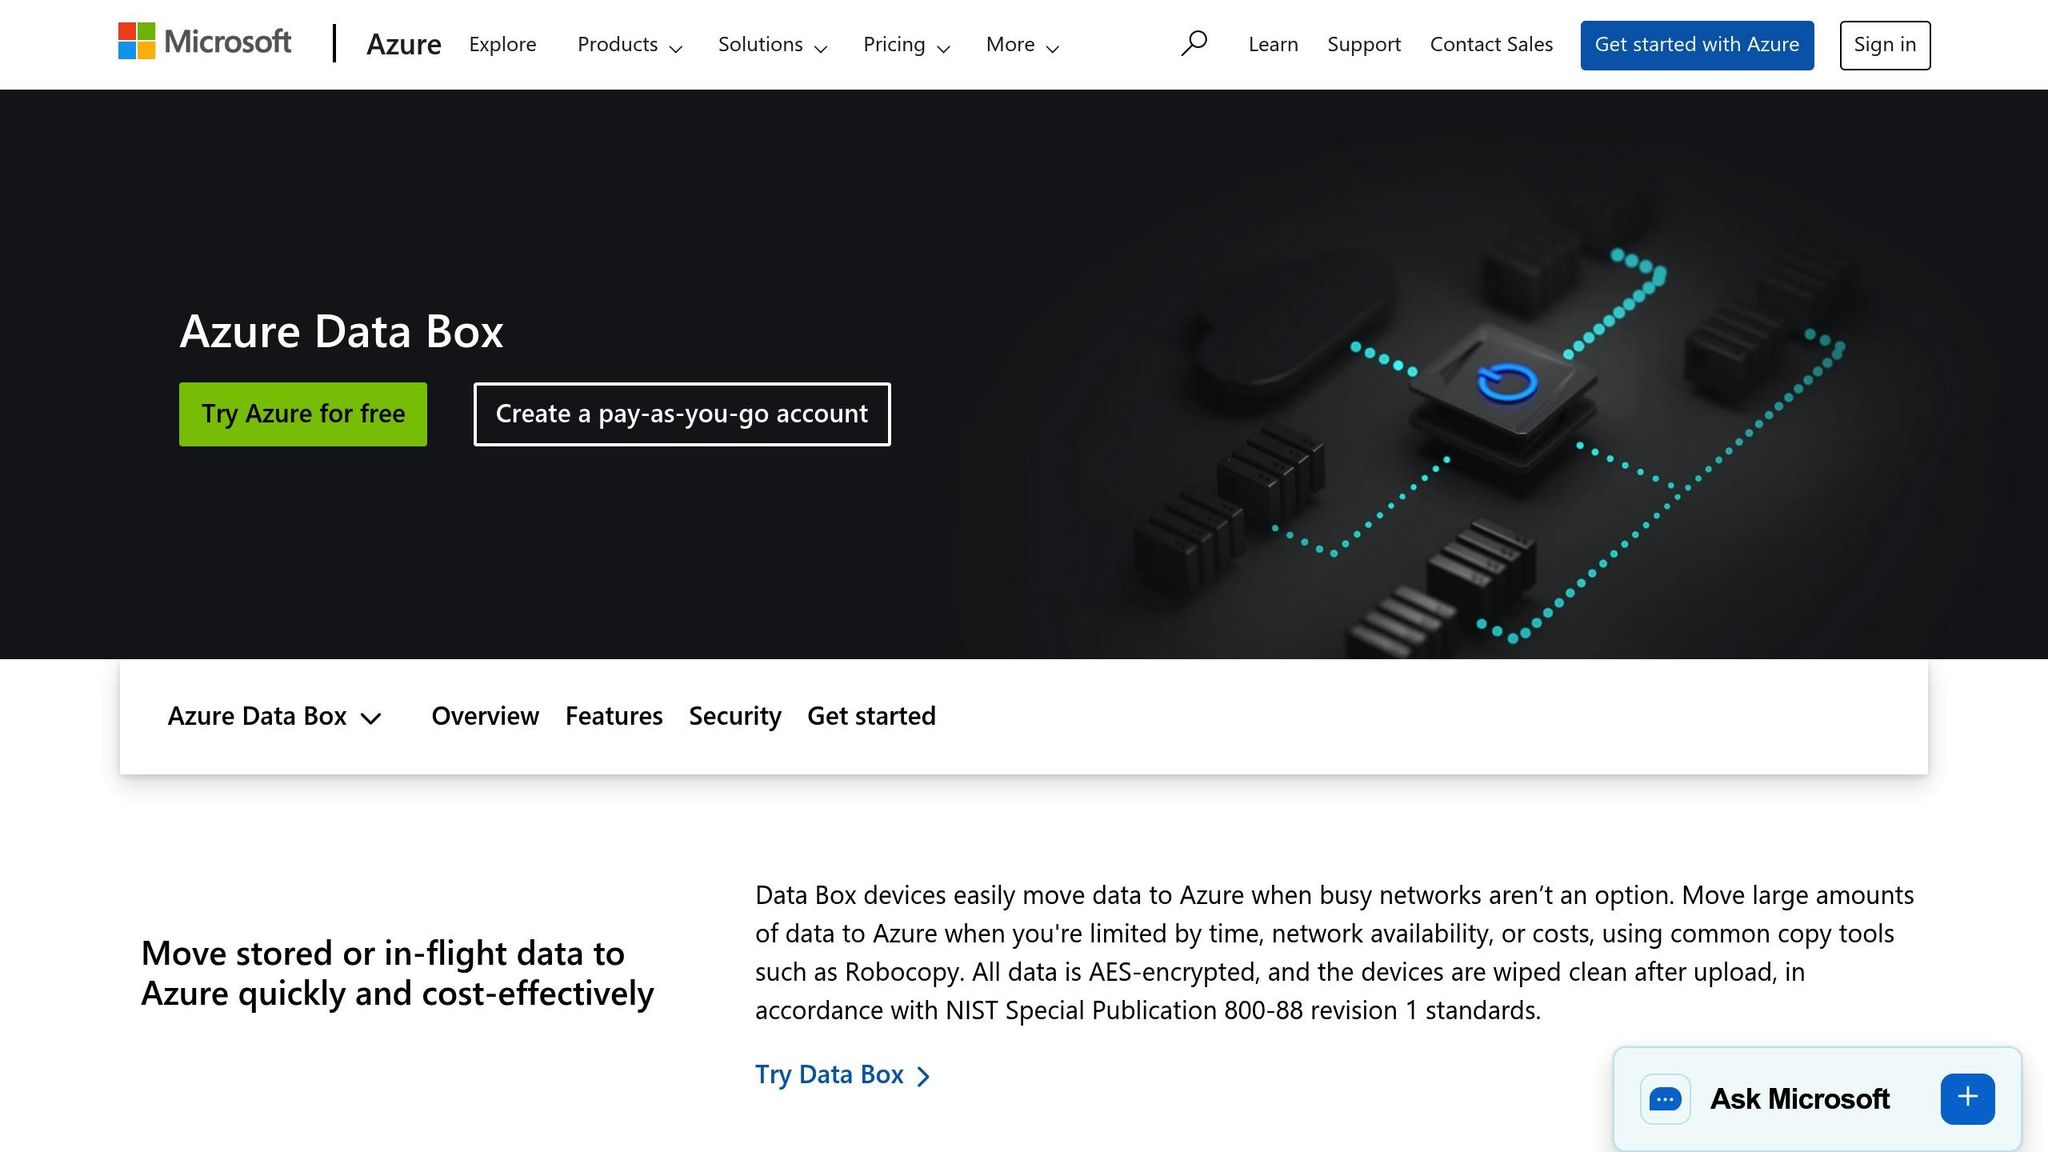
Azure provides several physical devices tailored for offline transfers, catering to various data volumes and use cases. Here's a breakdown of the options:
- Data Box Disk: This is the simplest device, offering up to 35 TB across one to five SSDs. It's a quick solution for smaller datasets that would take too long to transfer over the network. Setup is straightforward and takes about 15 minutes via USB 3.1.
- Data Box Next-Gen: Available in two models - 120 TB and 525 TB - this device is designed for larger migrations. It supports network speeds up to 100 Gbps and can achieve copy speeds of up to 7 GB/s using SMB Direct on RDMA, making it 10 times faster than earlier models. Setup takes less than 30 minutes, and AES 256-bit encryption ensures secure data transfer.
- Data Box Heavy: Previously offering up to 770 TB of capacity, this device has been retired and is no longer available for new orders. For cross-region transfers, such as from the US to the EU, the Direct Upload feature allows you to ship the device to a local Azure datacenter, where the data is uploaded to your destination region via Azure's private network.
| Feature | Data Box Disk | Data Box Next-Gen (120 TB) | Data Box Next-Gen (525 TB) |
|---|---|---|---|
| Usable Capacity | Up to 35 TB | 120 TB | 525 TB |
| Form Factor | 1–5 SSDs | Desktop-sized device | Desktop-sized device |
| Setup Time | ~15 mins | < 30 mins | < 30 mins |
| Interface | USB 3.1 / SATA | RJ45, QSFP28 (100 GbE) | RJ45, QSFP28 (100 GbE) |
| Encryption | AES 128/256-bit | AES 256-bit | AES 256-bit |
| Best For | Small to medium bulk transfers | Large bulk transfers | Very large bulk transfers |
Online Transfers: AzCopy, Azure Data Factory, and Data Box Gateway
If physical shipment isn't needed, online tools offer a seamless way to manage data transfers.
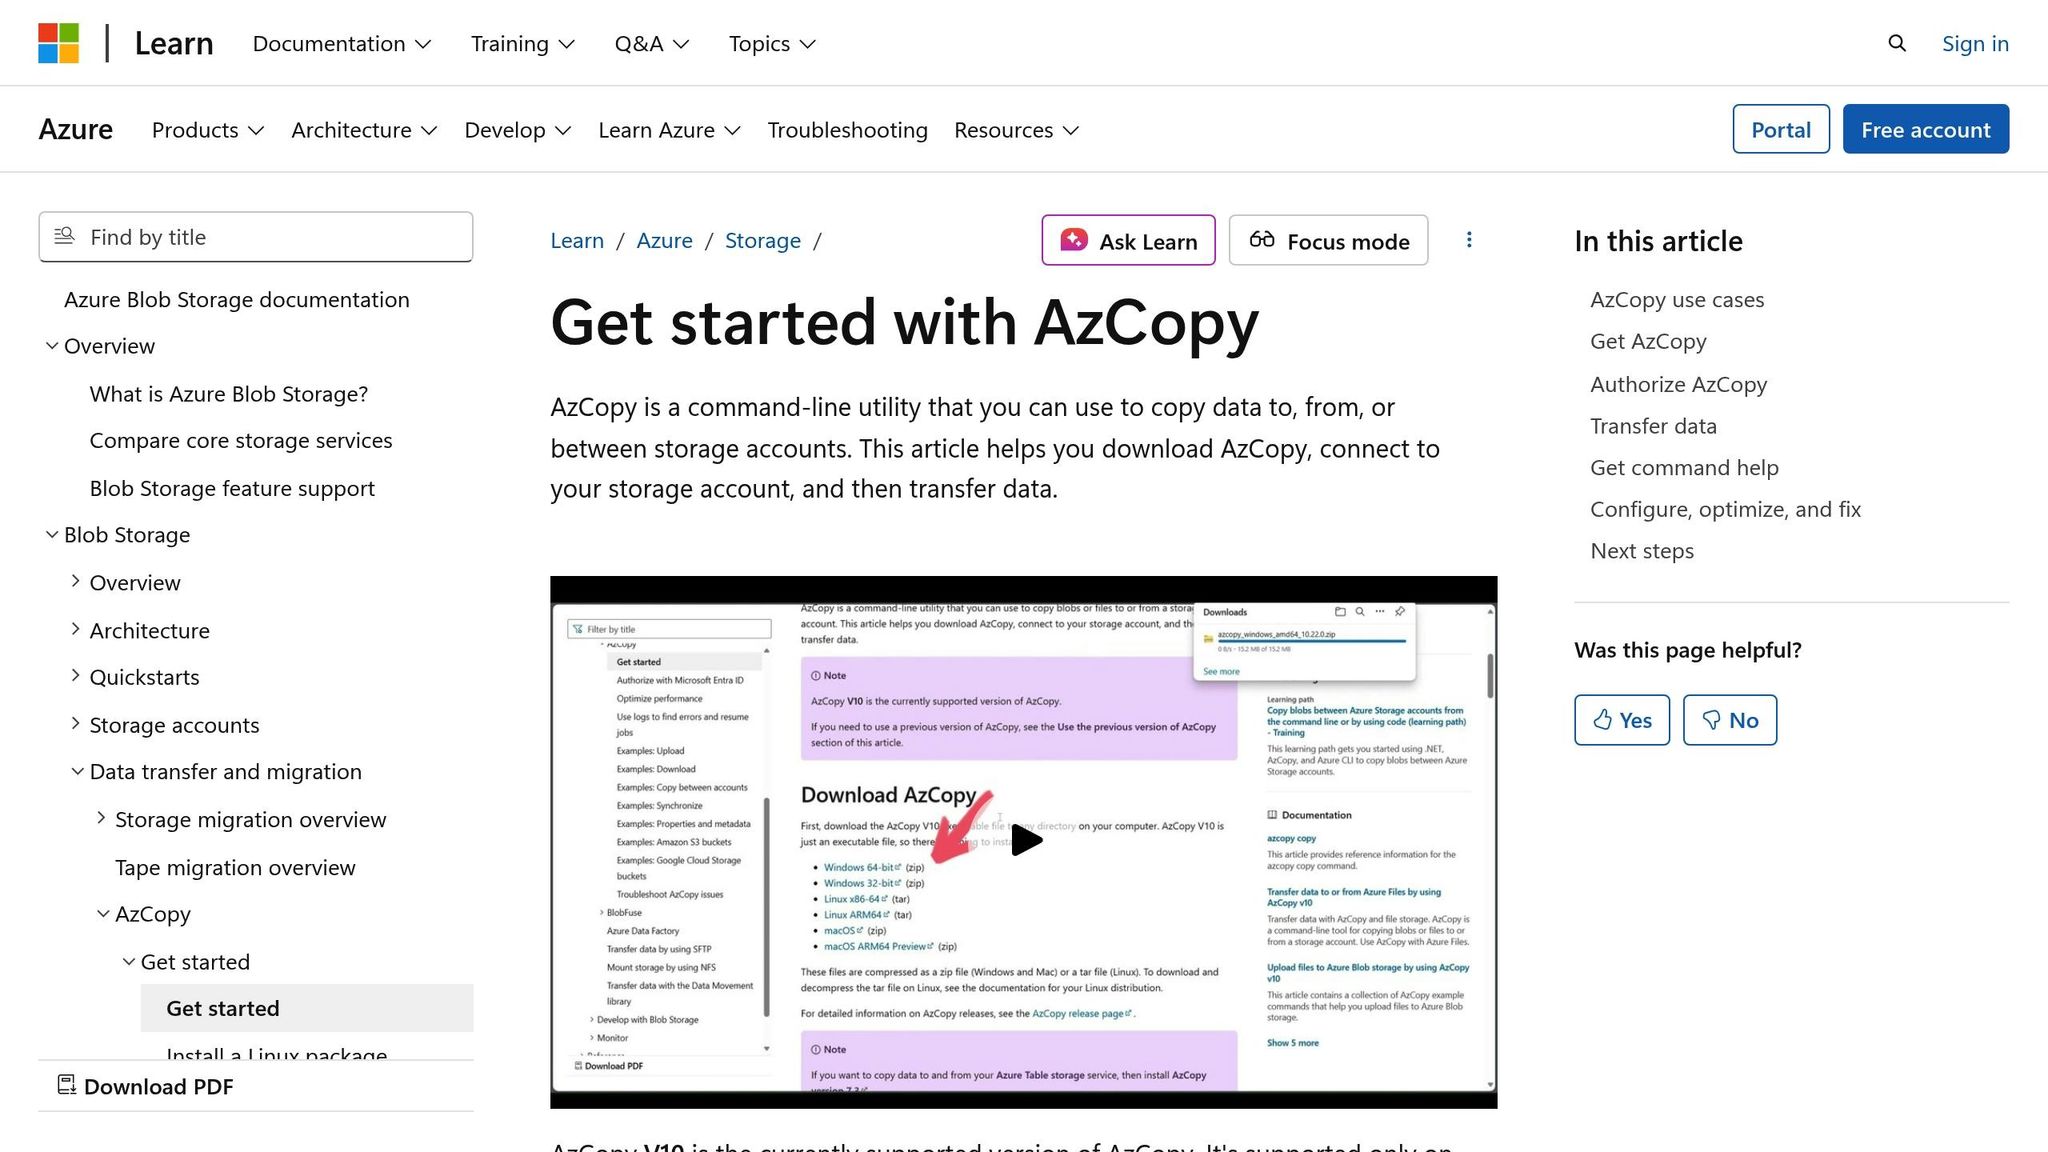
- AzCopy: This free command-line tool is perfect for transferring data to Azure Blobs, Files, and Tables. It supports parallel and resumable transfers, making it a go-to option for high-volume data.
- Azure Data Factory: Ideal for complex data pipelines, this managed service supports over 70 connectors. It enables you to move data between various sources and sinks, with built-in transformation and orchestration features. While its setup is more involved, it's well-suited for enterprise scenarios requiring scheduled and repeated transfers with preprocessing.
- Data Box Gateway: A virtual appliance that works on-premises, this tool is great for continuous data ingestion. It's particularly useful in the seed-and-feed strategy, where it handles incremental updates after the initial bulk transfer with a Data Box. The local cache ensures fast access until it reaches about 50–60% capacity, at which point older files are removed to make space for new ones.
| Tool | Data Types | Setup Time | Pre-processing | Best For |
|---|---|---|---|---|
| AzCopy | Blobs, Files, Tables | Easy (CLI) | No | High-volume transfers with parallelism |
| Azure Data Factory | 70+ connectors | Extensive | Yes (Transformation) | Complex, scheduled pipelines |
| Data Box Gateway | Blobs, Files | Moderate | No | Continuous ingestion, incremental updates |
| Azure Stack Edge | Blobs, Files | Moderate (1–2 hrs) | Yes (Edge compute) | Continuous ingestion with edge processing |
Optimize Transfer Efficiency
Boosting transfer efficiency often comes down to leveraging parallelism and compression. Tools like AzCopy automatically adjust concurrency settings based on your system's resources. For instance, if your machine has more than five CPUs, AzCopy sets concurrency to 16× the number of cores, capped at 300 requests. But when transferring data directly between Azure storage accounts, you can push concurrency even higher - sometimes exceeding 1,000 requests - since the data never touches your local machine.
To fine-tune performance, use the azcopy benchmark command to identify bottlenecks and adjust concurrency. Setting AZCOPY_CONCURRENCY_VALUE to AUTO allows AzCopy to dynamically adapt to real-time network conditions. If you're working with massive datasets containing millions of files, you can reduce logging overhead by setting --log-level to ERROR instead of the default INFO. For jobs involving numerous small files, adding --check-length=false can skip post-transfer verification, shaving off valuable time.
File size plays a huge role in transfer efficiency. Larger files - ranging from 256 MB to 100 GB - are far more efficient to transfer compared to thousands of tiny files. Small files generate extra overhead due to metadata operations and transaction costs. Azure Storage charges for read and write operations in 4 MiB increments, meaning even a 1 MB file incurs the cost of a full 4 MiB operation. To address this, consider bundling small files into larger archives before migration or using a streaming engine to batch events together.
For analytics workloads, compressed binary formats like Apache Parquet, Avro, or ORC are highly efficient. Parquet, in particular, shines in read-heavy scenarios thanks to its columnar structure, which allows you to skip irrelevant data entirely. Additionally, Azure Data Factory offers scalability up to 256 Data Integration Units (DIUs) for a single copy activity, providing substantial compute power for demanding tasks.
Enable Compression and Parallel Transfers
Parallelism is a core feature of most Azure transfer tools, but proper configuration is key. In Azure Data Factory, the parallelCopies property determines how many threads simultaneously read from or write to your data stores. Pair this with DIUs to scale compute resources according to your workload. While default settings work for many cases, customizing these parameters can drastically cut transfer times for large-scale migrations.
To manage memory during transfers, use the AZCOPY_BUFFER_GB setting to cap AzCopy's memory usage. This prevents your migration from overwhelming other processes on the same machine. On Linux systems, where file scanning can lag behind network speeds, increasing AZCOPY_CONCURRENT_SCAN ensures your network connections are fully utilized.
For optimal performance, run only one AzCopy instance per client. Distributing multiple instances across different machines avoids resource contention and maximizes efficiency. As Microsoft highlights:
"AzCopy performs best when only one instance runs on the client. If you want to transfer files in parallel, use multiple clients and run only one instance of AzCopy on each one".
For high-throughput scenarios, fine-tune block sizes. Custom applications should use block sizes larger than 4 MiB for standard storage or 256 KiB for premium storage to unlock high-throughput block blob performance. When transferring data between Azure storage accounts, rely on server-side APIs like Put Block From URL to keep the transfer within Azure's network, saving both bandwidth and time.
This groundwork ensures smoother incremental transfers.
Use Rsync and AzCopy for Incremental Transfers
Incremental transfers are crucial for keeping data synchronized after the initial bulk migration. When dealing with numerous files, use azcopy copy --overwrite=ifSourceNewer instead of azcopy sync. This approach skips the time-consuming up-front scanning and comparison phase, checking files only during the copy process. It’s particularly effective when most of your data remains unchanged.
For on-premises to Azure migrations, Rsync is a reliable option, especially when preserving file metadata. Using the archive mode (-a) ensures permissions, timestamps, and symbolic links are maintained while transferring only modified or new data. Add the -z flag to compress files during transit, which reduces bandwidth usage without significantly increasing processing time. Running rsync --dry-run lets you preview transfers and verify settings before execution.
Bandwidth throttling can help you balance migration speed with other network demands. AzCopy's --cap-mbps flag allows you to limit throughput, ensuring your transfer doesn’t monopolize the network during peak hours.
For massive migrations, break your jobs into smaller chunks, each handling fewer than 10 million files. AzCopy's performance declines significantly when managing over 50 million files due to job tracking overhead. If an interruption occurs, AzCopy creates plan files that let you resume transfers using azcopy jobs resume, saving you from starting over.
| Tool | Incremental Method | Compression | Parallelism | Best For |
|---|---|---|---|---|
| AzCopy | copy --overwrite=ifSourceNewer |
Not native | Built-in via AZCOPY_CONCURRENCY_VALUE |
Azure Storage (Blobs, Files, Tables) |
| Rsync | Delta-transfer with -a flag |
-z flag |
Single-threaded (unless using wrappers) | On-premises to Azure with metadata preservation |
sbb-itb-79ce429
Ensure Secure and Compliant Transfers
When migrating data to Azure, security is non-negotiable. Azure Storage ensures all data transfers are encrypted using HTTPS, safeguarding your data while in transit. For connections between on-premises systems and Azure, SSL/TLS protocols provide an added layer of protection against breaches.
For dedicated connections, the Azure VPN Gateway encrypts traffic between your Azure virtual network and on-premises locations using IPsec/IKE protocols. If you're using ExpressRoute for a high-speed WAN link, it's wise to layer on application-level encryption, such as SSL/TLS, for extra security. For physical transfers, Azure Data Box and Import/Export services rely on BitLocker encryption - AES 256-bit for Data Box and Data Box Heavy, and AES 128-bit for Data Box Disk. The WAImportExport tool automates disk preparation and encryption, while also generating journal files to track the status of each drive. These robust security measures ensure compliance and protect your data during migration.
Use Encryption for Data in Transit
Encryption should be a priority at every stage of data transfer. For online transfers, Azure uses HTTPS by default, while offline transfers rely on BitLocker to secure physical devices. To manage encryption keys effectively, Azure Key Vault (Premium or Managed HSM) offers centralized control, ensuring secure handling throughout the process.
To further reduce risks, especially in industries like healthcare or finance where compliance penalties for data breaches are severe, consider using privileged access workstations (PAWs). If network bandwidth is a bottleneck - such as transferring terabytes of data over a 100 Mbps connection - Azure Data Box provides a faster and more secure alternative to prolonged online transfers.
Preserve Metadata and Permissions
Maintaining metadata like file permissions and timestamps is crucial to avoid access issues after migration. Azure Storage Mover, a fully managed service, simplifies this process by preserving metadata during file and folder migrations, minimizing the need for manual adjustments. Azure Data Box (standard and Heavy) also supports metadata preservation, though Data Box Disk does not. Before starting your migration, confirm that your chosen tool and configuration will retain the attributes your applications rely on.
Verify Data Integrity Post-Transfer
Once your data has been securely transferred, verifying its integrity is essential. By reviewing job reports and logs, you can identify any skipped or failed files. Here’s how different tools can help:
- AzCopy: Use the command
azcopy jobs show --latest > migration_report.txtto generate a detailed report. - rsync: Enable verbose logging with
-v, and use a post-transfer--dry-runto compare source and destination files. - Azure Data Box: Monitor the Azure portal for real-time updates during the "Copy" and "Upload" phases.
- Import/Export: Check drive journal files for detailed status updates, keeping in mind that jobs are deleted after 90 days.
| Transfer Tool | Verification Method | Key Feature for Integrity |
|---|---|---|
| AzCopy | azcopy jobs show |
Supports concurrency, parallelism, and resuming interrupted copies |
| rsync | Checksums / Verbose logs | Archive mode preserves metadata, permissions, and timestamps |
| Azure Data Box | Azure Portal Status | Built-in verification after upload to Azure storage |
| Import/Export | WAImportExport Tool | Generates drive journal files for verification |
Plan and Monitor the Transfer Process
After setting up your optimized transfer methods, the next step is to focus on meticulous planning and monitoring. These steps are essential for ensuring a smooth migration. Pre-transfer testing helps validate tools and configurations, while scheduling the transfer strategically reduces disruptions. Once the process is underway, continuous monitoring allows you to quickly address any issues that arise.
Conduct Pre-Transfer Testing
Before diving into a full-scale transfer, test a sample of your data to uncover any configuration problems. For this, tools like rsync can be invaluable. Use the -a flag along with --dry-run to simulate the transfer without actually moving the data. If you're working with massive datasets - think tens of millions of files - be aware of the performance limitations of your chosen tools. Utilities like Robocopy or AzCopy may struggle with scalability in these cases. During testing, confirm that features like parallel transfers and compression options work as intended. Also, establish a way to verify data integrity, whether through checksum comparisons or built-in verification features. Make sure your migration strategy includes a tested restart process to handle any interruptions effectively. Once you're confident in the tools and configurations, schedule the transfer to minimize operational impact.
Schedule Transfers During Off-Peak Hours
Timing is everything when it comes to large-scale data transfers. Use about 90% of your available bandwidth to estimate how long the process will take. For example, moving 10 TB of data over a 100 Mbps connection can take roughly 11 days, while the same transfer over a 1 Gbps connection might be completed in just 26 hours. If your transfer is expected to take longer than 25 days, consider a hybrid approach. Start with an offline bulk transfer using Azure Data Box, then switch to online tools like AzCopy for syncing the remaining data. For ongoing or recurring transfers, Azure Data Factory provides powerful scheduling and orchestration capabilities, making it easier to keep data synchronized until you're ready for the final cutover.
Monitor Progress and Address Failures
Keeping a close eye on the transfer process is key to catching and resolving issues early. For online transfers, automate reporting to streamline the process. For instance, you can run azcopy jobs show --latest > migration_report.txt to quickly identify errors. If you're using rsync, enable verbose logging with the -v flag, and perform a post-transfer --dry-run to compare the source and destination. For offline transfers, such as those using Azure Data Box or the Import/Export service, the Azure portal provides advanced monitoring tools to track the job's progress. Be sure to update the delivery tracking number as soon as the shipment is sent to avoid delays in processing. Whether you're handling online or offline transfers, choose tools that can resume interrupted operations. After the transfer is complete, verify the data's integrity by comparing checksums or using built-in verification features to ensure everything arrived intact.
Conclusion
Moving large amounts of data to Azure requires a careful balance of speed, security, and reliability. Start by assessing your network bandwidth and the size of your dataset. If your network can't handle the load efficiently, offline options like the Azure Data Box family become a lifesaver. But for datasets under 1 TB and strong bandwidth, tools like AzCopy or Azure Data Factory can get the job done quickly and effectively.
Security should never take a backseat. Whether you're encrypting physical drives with AES 256-bit BitLocker or securing network transfers with SSL/TLS, protecting your data at every stage - at rest, in transit, and in use - is non-negotiable.
Verification is equally important. Always run checksum comparisons or rely on built-in verification features to ensure your data arrives intact. This step is your safety net, catching any corruption or missing files before they cause problems in production.
Choosing the right tools can make all the difference. Features like parallel transfers and compression can speed things up, while monitoring tools help you spot and fix issues as they happen. For massive datasets that span petabytes, a hybrid approach works best - use Data Box for the bulk of the transfer, then sync the remaining changes online.
The key to a smooth migration lies in planning, execution, and validation. Calculate your transfer timelines, test your setup, and thoroughly verify the data once it’s in Azure. By sticking to these best practices, you’ll keep your migration process secure, efficient, and ready for production. These steps fit seamlessly into your broader migration strategy, setting you up for success.
FAQs
What should I consider when deciding between online and offline methods for transferring large datasets to Azure?
When moving large datasets to Azure, several factors come into play, including data size, bandwidth, cost, and security. If you're dealing with datasets in the terabyte to petabyte range and have slower internet connections (e.g., 100 Mbps to 1 Gbps), offline methods like Azure Data Box or Azure Import/Export are often quicker and more practical. On the other hand, if you have high-speed connections (several Gbps), online tools like AzCopy or Azure Data Box Edge can simplify the transfer process without needing physical devices.
Cost and operational considerations are equally important. Offline transfers might save on network costs but involve securely shipping physical devices, which adds logistical complexity. Online transfers, while convenient with features like end-to-end encryption, require a strong network setup to prevent throttling issues. Additionally, think about downtime tolerance - whether you need a one-time transfer or ongoing synchronization. Offline methods can minimize migration windows, while online tools are better suited for incremental updates or continuous data movement.
For a seamless migration, AppStream Studio can help you design a custom plan that prioritizes secure, efficient data transfers while keeping downtime and data integrity in check.
What are the best practices for securely transferring large datasets to Azure?
To protect your data during large-scale transfers to Azure, start by securing it both at rest and in transit. Use tools like Azure Storage Service Encryption to safeguard stored data, and TLS 1.2+ to secure network traffic. For added control, manage your encryption keys with Azure Key Vault or your own customer-managed solution. Strengthen access control by implementing strict Role-Based Access Control (RBAC) and conditional access policies on your storage accounts or transfer devices. Keep an eye on all activities by leveraging Azure's logging features.
When choosing a transfer method, consider your network's capacity and the size of your data. For offline transfers, Azure Data Box appliances offer built-in encryption and tamper-evident seals for added security. For online transfers, tools like AzCopy or Azure Import/Export provide HTTPS and SAS-protected endpoints for safe data movement. To maintain data integrity, enable checksum verification and retry mechanisms during the transfer. Once the process is complete, validate the transfer by comparing file hashes and keeping logs for future audits.
If you need guidance, AppStream Studio’s Azure specialists can assist you in implementing these practices to ensure your large data transfers are secure, efficient, and disruption-free.
How can I efficiently transfer large datasets to Azure while ensuring security and minimal downtime?
To move large datasets to Azure efficiently, start by selecting the method that suits your network's capacity. If your bandwidth ranges between 100 Mbps and 1 Gbps, Azure Data Box devices or Azure Import/Export are great options for offline transfers, especially when online transfers would take too long. For high-bandwidth connections (1 Gbps or more), a direct network path like ExpressRoute, paired with Azure tools such as AzCopy or Azure CLI, delivers the best performance.
Here are a few tips to make your transfer process smoother and more secure:
- Split and parallelize transfers: Use multi-threaded tools like AzCopy to maximize your network's potential.
- Compress your data: Shrinking the transfer size can save time, but ensure the target service supports the compression format.
- Encrypt your data: Always encrypt during transit and storage, and confirm data integrity with checksums or MD5 hashes.
For additional support, AppStream Studio can help you choose the right Azure Data Box device, set up secure ExpressRoute connections, and automate transfer workflows. This ensures a seamless and secure migration experience tailored to your requirements.